Your first step is to enter your data into the XML Import spreadsheet and generate an XML file.
Want to watch a video of this process? See our XML Import: Part 1 video tutorial (YouTube).
New or existing records?
•If you're importing data into existing records, you must include the System ID or Accession Number.
•If you're creating new records with accession numbers, you must first ensure the accession number format exists in Vernon CMS.
•If you are creating new Person records, you must include the Record Type field and Person/Corporate Type field.
Datafiles and fields
•You can only import data into one datafile at a time. For example, Object.
•For some tables of data, such as the Valuation table, you must import data into multiple fields.
•If you're importing data into authority fields, you must first ensure the authority terms exist in Vernon CMS.
•If you are importing data into location fields, the Current Location and Location History fields will not be updated. Instead, use Bulk Move and Batch Location Change to update or assign locations to your records after the XML Import.
•If you have more than one entry mapped to one authority field, you must enter each piece of data into a separate cell of your spreadsheet, and map it to the same field in Vernon CMS. For example, if you are importing more than one Primary Maker, their names must be in separate columns of your spreadsheet.

How to prepare your data for import
In this example, we will update existing records using the System ID. We will add new data to the Valuation table and the Risk Assessment table.
1.Go to the Wincoll > Toolkit folder and make a copy of the XMLImport.xlsm spreadsheet. Paste it in a folder you can easily access, and rename it to reflect the data you will import. For example:
valuations.xlsm
2.Open the spreadsheet.
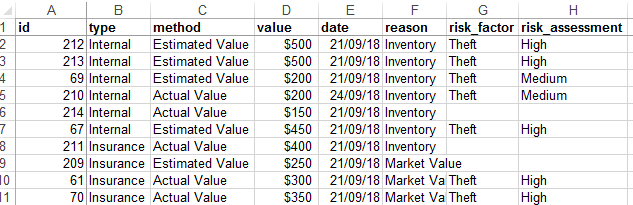
3.Go to the Data tab of the spreadsheet. In the first row, enter headings that represent the fields you want to import data into. The headings must be lower case. Use underscores instead of spaces. For example, enter "id" for the System ID, and "risk_factor" for the Risk Factor field.

4.Enter the data into the columns below each heading. Each row represents one record. Don't leave any gaps in the rows.
5.Go to the Control tab of the spreadsheet. Under Destination, enter a filepath and filename ending in ".xml". For example:
C:\temp\valuations.xml
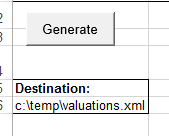
6.Click the Generate button. An XML file will be saved to that destination.
Next step: Setting up the XML configuration