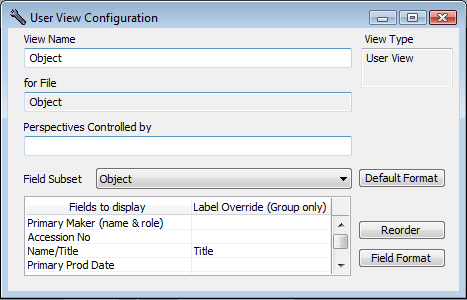
1.Go to Tools menu > System Maintenance > User Defined Parameters > User View Configuration.
2.Give the User View a Name in the View Name field.
3.Click in the File field and enter the name of the datafile you want to create a User View for.
4.If necessary, add a perspective.
5.Click in the Fields to Display field and enter the field names you want in the User View, or click the Options button  to select fields.
6.You can optionally give the table a different name in the Label Override (group only) field. This will change the Group Labels only, not the individual field names.
7.Click the Reorder button if you want to change the order of the selected fields.
8.Include images in your User View (if desired) by checking the Images checkbox.
The following checkboxes can also be checked to control aspects of image display:
•Caption checkbox enables/disables caption display
•Primary Only checkbox will only show the Primary Image
•Thumbnail checkbox should be checked if you do not need high quality images in the printed report.
9.Click on the Default Format button to access the User View Format window.
The default font is Tahoma. You can change the font by double-clicking in the font field.
You can also change font settings for each group by clicking the Group Format button.
You can set the default column proportions for the labels, data, and images by clicking and dragging the column dividers.
10.Save the record.

The User View Configuration Window with a view for Objects and some fields to show.