Bulk Move moves multiple objects (or their parts) and Packing Units and their contents to a single new location, or back to their individual Usual Locations.
You can also move objects one at a time: moving an object.

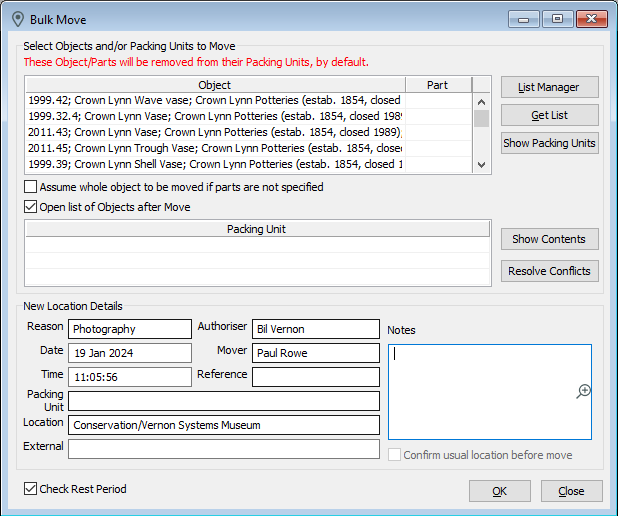
The Bulk Move window showing some Objects being moved to the photography lab.
Moving Multiple Objects
1.Go to the Tools menu > Location Functions > Bulk Move.
2.Select the objects to be moved.
oMake sure that the objects are not open in the background.
oType objects into the table or click Get List.
oIf you are moving packing units, enter them in the Packing Unit table.
oTo check if any of the objects are in packing units, click Show Packing Units. If objects are in packing units, they will be moved out.
3.In New Location Details, enter the Reason, Date, Time, Authoriser, Mover, and the new Location for the objects.
oIf you are moving objects back to their usual locations, enter Usual Location as the Reason. Click into the Packing Unit field, Location field and External field to automatically fill in the default terms. Select Confirm usual location before move.
oIf you enter Usual Location as the Reason, and you enter a location in the Location field, the Usual Location for each object will be updated to this location.
4.Click OK.
When the Bulk Move is finished, a window will open asking if you want another transaction. Selecting Yes will open a new Bulk Move window.