You can export data directly to Excel with the Export option in Reporting. You can also export to Excel via List Manager.
How to export records into Excel
1.Find the records you would like to report on and click the Report button  on the toolbar.
2.To use an existing report template, click More Templates and select it from Portfolio , then skip to step 9. Otherwise, click Create New Template.
3.Change the Report Type to Export.
4.Click Select Fields to select your fields. To change a field's heading, click the Field Details button  .
.
5.Click Sort Report to choose the sort field(s).
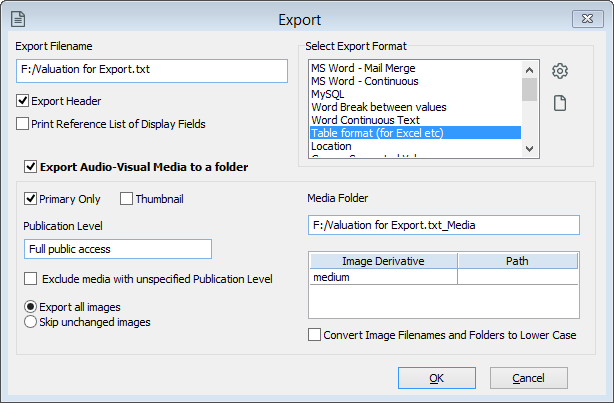
6.Click Format and select Table format (for Excel etc) as the export format.
7.Click in the Export Filename field and click the Browse button  . Choose a location for the file, and enter a name. We suggest exporting the report as a text file (.txt).
8.You can choose to export audio-visual media to a folder by ticking the checkbox. When this checkbox is ticked, additional image options will become enabled. Make your selections, then click OK.

Image options for exports.
9.If you need to change the records for the export, click Record Selection.
10.Click Run Report.
11.Click the Export button to run the report.
12.Open Microsoft Excel.
13.Go to the File menu and select Open.
14.Locate the file you exported and click Open. You may need to change the drop-down menu to the right of the File name field to All Files (*.*) to show the .txt file.

File Explorer All Files Option.
15.Follow Excel's Text Import Wizard to convert the text file.
16.Your resulting spreadsheet should look something like the following picture. Field names appear across the top row and exported records are listed in the rows below.

17.When you have finished, save the spreadsheet as an Excel Workbook (.xlsx) file.