You can attach any number of images to objects, people, documents, events, activity files, and many other datafiles. To link multiple images to a record(s) at once see the Import & Link Images tool.
Attaching an Image to an Object Record:
1.Open the record that you want to attach an image to.
2.Open the Photo/Audio-Visual References window.
3.Click into the next empty row in the table
4.Click on the Go To File button  on the toolbar to access the Photo/Audio-Visual window.
5.Click into the Digital Filename field.
6.A Folder button  will appear in the field. Click on the folder button to open File Explorer and find the image you want to attach.
Alternatively, drag and drop an image from the folder into the image display box in the bottom right.
The folder must be shared between all Vernon users (not a personal desktop folder).
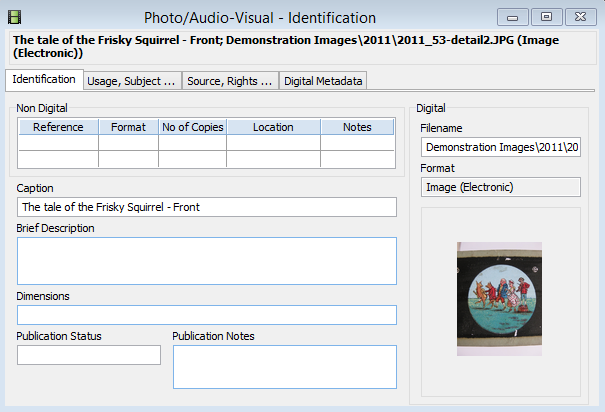
7.Add any other details about the image, such as a caption, or rights associated with it.
The caption will be visible below the image when it is displayed on a record.

The Photo/Audio Visual Identification window showing an image with a caption.
6. Save the record, and then close the Photo/Audio-Visual Identification window.
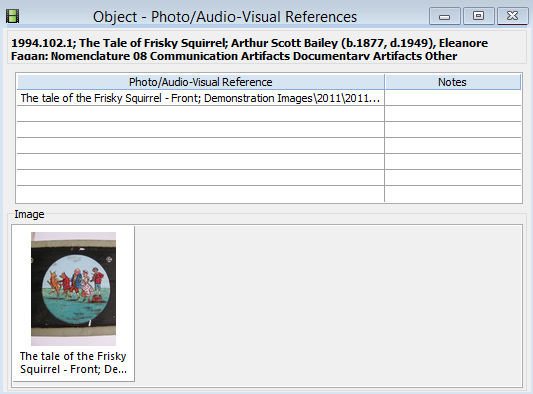
The image will then be attached to your record, and you will see it in the table. The first image in the table is the primary image.

The Photo/Audio-Visual References Window showing the image linked to this object.