When you have set up the XML import configuration, you can import your data into Vernon CMS.
Want to watch a video of this process? See our XML Import: Part 3 video tutorial (YouTube).
How to run the XML Import
1.Go to the Tools menu > XML > XML Import > Import.
2.In the Import Configuration field, enter the name of your XML import configuration.
3.Vernon CMS will update the Import File, Vernon Datafile, and Status for new records fields (and the Record Matching tab) with information from your configuration.
4.In the Save results as List field, enter a name for the list if you want to save your records with imported data as a list so that you can easily find them again.
5.Click Import.
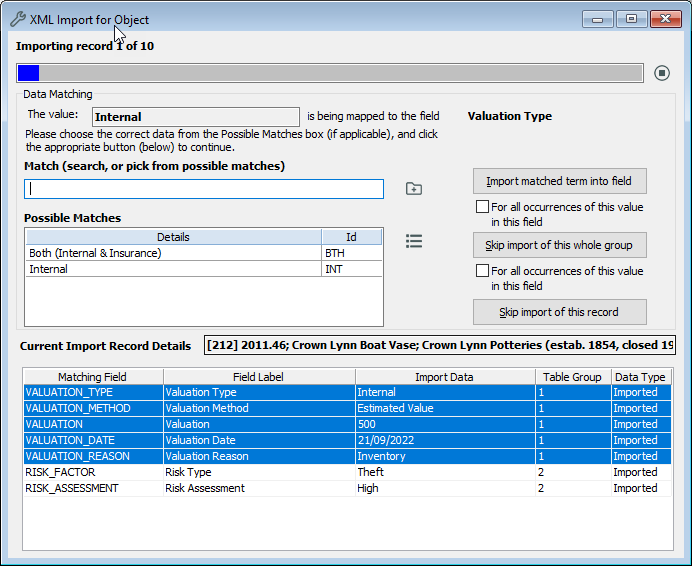
6.The XML Import Matching window will open and the system will start importing data.
7.When the import is finished, a report will appear to show how many records were processed and if there were any errors.

The XML Import window, on the Parameters tab.
Validating data
Authority terms and dates will be validated during the import. Validation is optional for accession numbers.
If data seems invalid, or there’s more than one match, the import will pause.
Choose one of these options:
•Select the correct term from the Possible Matches list (or enter it in the Match field), then select Import matched term into field. You can select ‘For all instances of this value in this field’.
•Select Skip import of this value. You can select ‘For all instances of this value in this field’.
•Select Skip import of this record.
Stopping the import
•If you need to stop the import, you can click the Stop button at the end of the progress bar.
•When you want to resume the import, in the XML Import window, select Resume an incomplete XML Import and select from the imports listed. The details for this import will enter automatically in your XML Import window.
Previous step: Setting up the XML configuration